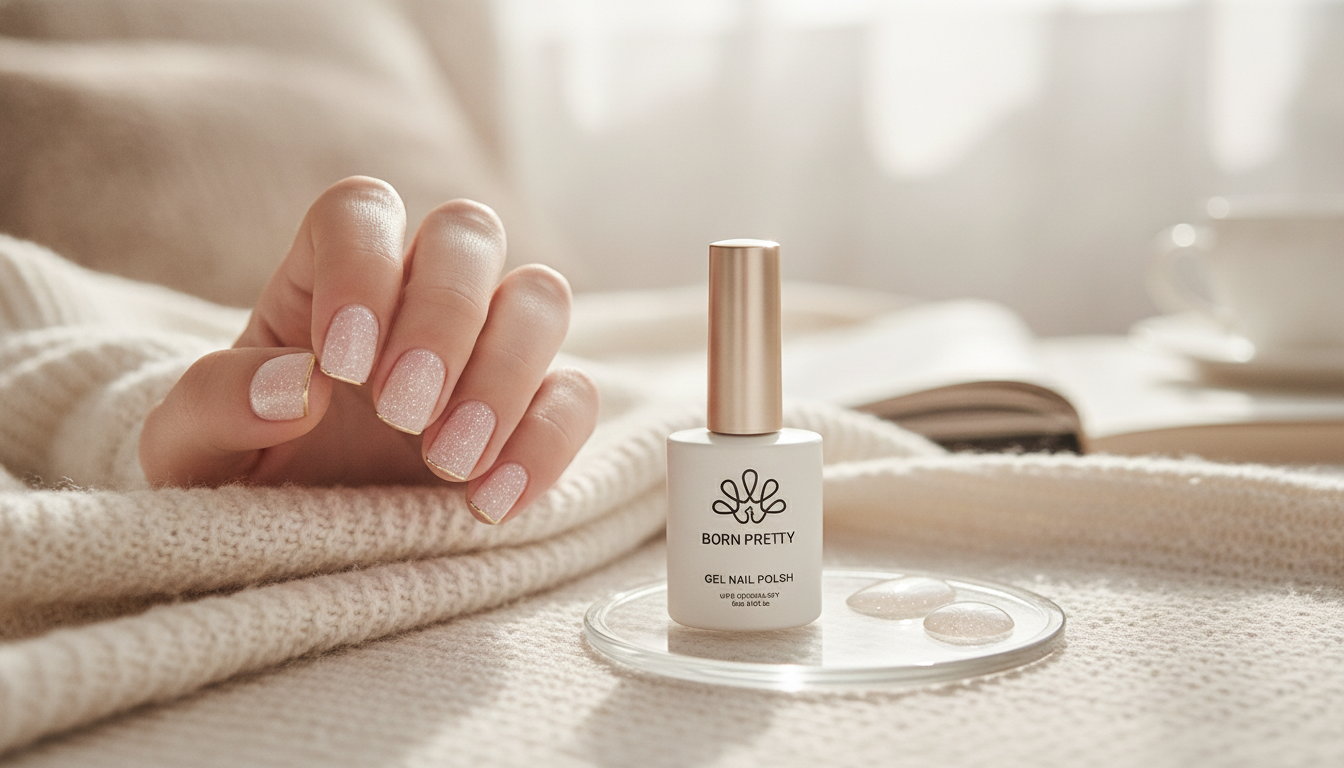
A sheer nude gel with a jelly finish and snow-like glitter can shift from barely-there to softly sparkling depending on how many coats are applied. The result is a clean, polished manicure that still looks light and natural—perfect when you want shine and refinement without an opaque, heavy color. Below is a practical guide to the look, performance, and the steps for applying, curing, layering, and removing a snow glitter jelly nude gel polish for salon-style results at home.
What the Snow Glitter Jelly Nude Look Is
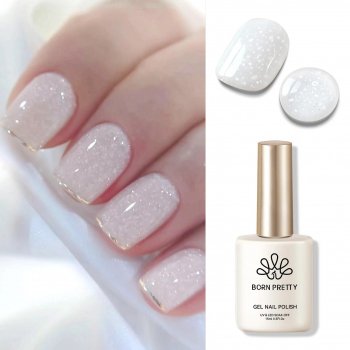
This style combines two effects that complement each other: translucent nude color and ultra-fine sparkle.
- Jelly nude effect: a translucent tint that lets the natural nail line show through for a clean “your nails but better” finish.
- Snow glitter effect: fine reflective particles that read as a soft shimmer (not chunky glitter).
- Buildable coverage: one coat looks like a tinted gloss; two to three coats create a more even nude tone with noticeable sparkle.
- Versatile styling: works for minimalist manicures, bridal looks, and as a base for nail art.
Quick Details at a Glance
This gel is designed for layering, so the payoff is more about depth and glow than instant opacity. The 15ml size is convenient if you like repeat sets, overlays, or frequent touch-ups.
15ml Snow Glitter Jelly Nude Gel Polish is also easy to pair with nude, white, silver, and pastel design elements.
Product Snapshot
| Item |
Details |
| Product name |
15ml Snow Glitter Jelly Nude Gel Polish |
| Net content |
15ml |
| Finish |
Jelly (sheer) with fine glitter |
| Best for |
Natural-looking manicures, layering, glitter-tint base |
| Availability |
In stock |
Who It Works Best For
- Short to medium nails: the sheer nude visually elongates without looking heavy.
- First-time gel users: minor streaks tend to be less noticeable than in fully opaque shades.
- Anyone sensitive to bold colors: a polished finish that stays subtle and wearable.
- Layering fans: use it over a nude base or under art elements to add depth and “lit from within” shine.
How to Apply for a Smooth Jelly Finish
A jelly manicure looks best when the layers are thin, even, and fully cured. Rushing usually shows up as ripples, uneven tint, or early lifting.
- Prep: shape nails, gently push back cuticles, lightly buff the shine, and remove dust.
- Dehydrate: cleanse the nail plate so gel adheres evenly (especially around sidewalls and the cuticle line).
- Base layer: apply a thin base coat and cure according to your lamp’s guidance.
- Color coats: apply thin, even coats—avoid flooding the cuticle; cure between coats.
- Build gradually: stop at 1 coat for a sheer tint, 2 coats for a balanced nude, 3 for a richer nude-jelly look.
- Seal: apply top coat for gloss and protection; cap the free edge to reduce tip wear.
Curing Tips to Keep Glitter Even
Fine glitter can look “patchy” when it’s pushed around by heavy brush pressure or suspended in gel that’s too thick. Small technique tweaks help the sparkle distribute evenly.
- Use thin coats: thicker layers can wrinkle or cure unevenly, shifting glitter into lines.
- Float the brush: light pressure reduces streaks and prevents pushing glitter into tracks.
- Check sidewalls: before curing, run a clean detail brush around edges if any gel drifts.
- Fully cure each layer: under-curing can cause dullness, peeling, or faster chipping.
- Let the sparkle settle: after brushing on, pause briefly before curing so particles disperse more evenly.
Wear, Maintenance, and What to Expect
- Durability depends on prep: early lifting commonly starts at cuticles or sidewalls if oil or dust is left behind.
- Glitter helps disguise wear: micro-sparkle can make small imperfections less noticeable day to day.
- Top coat refresh: a thin top-coat refresh can restore shine if gloss dulls over time.
- Protect the manicure: wear gloves for cleaning and avoid using nails as tools.
Removal Without Over-Buffing
Gentle removal keeps natural nails strong and smooth, especially with repeated gel sets.
- Lightly file the top coat: break the seal so remover can penetrate efficiently.
- Soak method: use acetone-soaked wraps or pads and wait until the gel softens.
- Gentle lift-off: push softened gel away with a pusher; never force or peel.
- Aftercare: wash hands, apply cuticle oil, and moisturize to restore flexibility.
Style Ideas Using a Snow Glitter Jelly Nude
Safety Notes for Gel Products
For general guidance on nail product safety, review the FDA’s nail care products information. For information about skin reactions, see the American Academy of Dermatology overview of contact dermatitis.
Shop In-Stock Picks
FAQ
How many coats are needed for a natural nude jelly look?
One thin coat gives a sheer, tinted-gloss look. Two thin coats create a balanced nude-jelly effect, and three thin coats make the nude tone look more even while keeping the translucent “jelly” depth—just cure each layer fully.
Why does gel polish lift near the cuticle after a few days?
Common causes include leftover oil or dust on the nail plate, flooding the cuticle, applying coats too thick, under-curing, or not capping the free edge. Focus on thorough prep, keep product off skin, use thin layers, and cure for the full recommended time.
How can glitter be kept from looking patchy?
Apply thin coats and float the brush with light pressure so glitter isn’t pushed into streaks. Pause a few seconds before curing to let particles settle, and tidy the sidewalls with a clean detail brush before placing the nail in the lamp.
Recommended for you









Leave a comment